

Author Recording Audiobooks
A basic Setup
Disclosure
I am many things. For the purpose of this article, I am (1) an author who reads her own novels to tape for audiobooks; (2) a long-time professional technologist. I am not a sound engineer, nor sound editor, nor audiobook publisher. I shall present what I know from the context of my quiet home office in Vermont. Please augment my information with your own research. Head over the YouTube and use additional resources.
I am providing links to B&H in this text. I am not affiliated. I do not get any credit, kickbacks, commissions. I just trust this store and have for decades. Don’t shop on Fridays!
The photos are causing Substack to tell me I hit a max size limit. I may post photos in a revised version.
For
Bill, Jane, and Joe - cuz you asked.
Why Audiobooks?
I read books by listening. Sorry, all. I often use the verb “read” when my eyes are closed and I listen to a book. I do this because I am better understood in public. I consider it reading because 90% of my literary pleasure for my entire life has come through my ears. I have strong memories of listening to E.B. White read me “Charlotte’s Web” on a multi-platter album set on my parent’s hifi as a child. I remember crying while listening my way through “Velveteen Rabbit.” There is an author and long time teacher out there whose voice still dominates my experiences with “Winnie the Pooh.”
I am dyslexic, diagnosed after slogging through schools with poor marks. And for decades, I make my living sitting at a keyboard typing 60-80 words per minute. I HATE holding books up with my hands. I struggle with process of getting through pages comfortably. To cap off this experience, I had an accident in October 2025 which resulted in both wrists being surgically reconstructed.
I spent approximately 200 hours per month in November and December after my accident listening to books.
Why audiobooks? Answer: There is an audience
There is an audience of folks struggle with the printed word. To provide an audiobook is a way of saying to folks with vision issues, physical challenges, learning disabilities that you know we are out here wanting great works to enjoy.
It is a growing market as folks connect their ear holes to mobile phones and walk/run/exercise.
How to Find Audiobooks?
Libby – a library-based audiobook source where readers can access ebooks and audiobooks for free. Authors make money on the initial sale of each “copy.”
Libro.fm – a paid service for audiobooks that you (reader) link to your favorite bookstore thus adding to their revenue with each purchase. This is my preferred technique. Each purchase I make funds both artist and local bookstore.
Barnes & Nobles – a paid service that has limited pricing options. Not a fav because you feel stuck with 1 title per month. End of.
Audible – An Amazon service. My least favorite and the most popular. To be fair, I have 324 title that I have “leased” from Amazon on here. Regrettably, Amazon feels free to remove books or lock books on a whim. I don’t own the books which pisses me off because I paid for them.
It is possible for authors to distribute PDFs with audiobooks or direct readers to a website for supplemental material such as maps, illustrations, literary citations, etc.
Audio on Substack
I accidentally learned through my short story series that audio articles on Substack get distributed to all common podcast sites. Therefore “Trowbridge Dispatch” by “I.M. Aiken” can be found on Spotify, and other sites. To do this, I publish the short stories twice. The audio always goes out first without any fanfare or posting. I snag URL from the audio, then link it in the printed version of the same story. That way the “podcast” version has a series number and an episode number.
Downside of Short Works on Audio
The services above charge the same for books regardless of length. I hate paying $14.99 for a 20 minute short story. I’d rather pay $14.99 for a 30- or a 60-hour long book. With services that limit you to 1 or 2 “books” per month, a 20 minute short leaves half-a-month empty. My decision is distribute short works for free as hooks for the longer works. It would be cool if the audiobook services found a way to help poets and short story writers. I ain’t boss there.
What Does it Take to Record and Produce an Audiobook?
A story teller’s voice
At least 3x the duration of your book in time (for a 10 hour/100,000 word novel, budget 30 hours of intense work that requires 30 to 60 minute stretches with ZERO interruptions.
Some tools & tech
Skills with audio editing software
Knowledge and understanding of the “rules”
A Story Teller’s Voice
I had a tiny bit of training to sing and to present a few lines on a stage when I was younger. I was NOT good, but the training was. During the early part of my career, I taught computer programming at a community college. Therefore 2 nights/week, I stood before a classroom of 25 adults, most of whom were older than I. Later in my career, I was trained as a public speaker by my employer. This training involved videotapes, coaching, and good tricks for standing in front of audiences. I have spoken to audiences on four continents.
Regardless, I love reading poetry and stories aloud. I don’t do a lot of voices. I do try to differentiate characters a bit. Others do it better. Give me a Saskia Maarlveld story, I am happy. Jim Dale gave us 130 character voices that earned him multiple awards for his audio work with Harry Potter. I muddle along, thank you.
I am the author. I write about local folks. I strive to give something to my characters. Furthermore, I know the story well. I know the emotional buttons I wish to hit (hit you with). I make it a performance. I work dynamics in my voice. I let emotion slip through. In the last chapter of Captain Henry (Catalyst Press, 2026), you’ll hear me at the very edge of crying. You may hear my voice reflect the suppressed laugh. My tone, while I read, is deliberate. I want to keep you engaged.
Tough Work?
I recorded “Stolen Mountain” (Catalyst Press 2025) with a cough that lasted 3 months. I can hear the cough drop I hid between the cheek and my gums.
I recorded “Captain Henry” with two broken wrists. I still had internal fixators under my skin on both forearms/hands.
When tired, I mess up. I am good for one chapter per day. Twenty chapters will take me a month to record.
I have a small typed sticker on my monitor. It reads:
5000 words, 37 minutes
2000 words, 14 minutes
These values are based on my word read by me. Your experience may differ.
I strive for chapters that are between 2000 and 4000 words. When I cross the 5000 word mark, I get really tired.
I tend to record in the morning, have lunch, then edit in the afternoon, then collapse.
I am performing for that hour that I read.
Yes, it is tough work.
A 3000-word chapter will take me an hour to record well. Oh, you want to tell me I just provided stats equating word-count to duration. A 3000-word chapter takes about 30 minutes to listen too. True. It takes about 45-60 minutes to record. I make mistakes. I read wrong. I inflect wrong. I land on the wrong voice for the speaker. My f’n phone, Teams, email beeps. The house phone rings. I lean away from the mic to breathe and recover. And sometimes, when I can’t read the sentence/graph as I wrote it, I re-write it and give it another go.
I have observed that my writing changes when I know I am to record my own work. I write a script that I can flow through. For me, a native English speaker raised near Boston, I lean heavily on Old English vocabulary. I write to read aloud. When I fail to, I flub the recording then re-write. I keep sentences shorter. I avoid run-ons and complex clauses. I lose cadence. I get out of breath.
Silence
Silence in your studio is required.
What your ears hear, your mic hears. More on this below. I tell spousal human: I am recording. And this mic does not pick up the squeaky floor or the toilet flush from upstairs.
My office chair, comfy and adjustable squeaks. I sit on a 5-legged stool or a wooden kitchen chair with no padding. My ass hurts after an hour’s intense work. One chair squeak picked up on tape during edits often means a re-record of a section. HATE.
I don’t have a soundproof booth in my office. I do have one upstairs and I abandoned it to work and record in my office. I can hear the room a bit. My bay window doesn’t reflect back. The rear wall is all books (sound absorbing). Monitors and messes soften other hard spaces. I seriously wish I hadn’t purchased a glass topped desk. Glass is noisy. I have positioned over-sized neoprene pads on my desk tops (think really big mouse pads).
Your mic selection matters here (later).
Tools and Tech
Terminology
ACX – The audiobook standards for files and parameters. Basically driven by Amazon, even if you don’t publish with Amz, they’re da boss. End of.
DAW - Digital Audio Workstation is the audio editing tool need to morph your mistake ridden, multiple takes crap into something coherent and compliance with required standards.
Dead Cat – A Dead Cat in this industry is a fluffy, fuzzy, soft thing that goes over the mic to reduce wind noise when outdoors. Can help with plosives too.
Gain – This is the microphone’s version of volume. Volume is the relative loudness a sound is projected. Gain is the relative loudness a sound is capture. Higher the gain, the more sensitive it is (flushing toilets a house away).
Auto-Gain – Auto gain is a feature hidden in a lot of USB mics, and easy-to-use software. Auto-gain will increase the gain if the mic “hears” nothing. It will reach out to find the spinning fan or dog fart in a far room. Do NOT use auto-gain. Turn if off. You’ll hate it.
Monitor – A stupid collision of terms when audio met computers. A monitor, in the audio world, is a headset or a set of speakers. A monitor allows you to monitor the audio. Monitors come in 2 flavors:
Host monitor – allows you to listen to the sound coming from your computer (hosting your DAW software)
Direct monitor – allows you to listen to the sound coming from your mic (direct).
There is a few millisecond delay between the two. When recording, I tend to listen to “direct”. When editing, I listen to “host”. Sometimes, I use the wrong setting, but to avoid the wierdness of the tiny delay, I lift one of my ear cups off my ear.
Over-the-Ear (aka “Cans”) – most audio engineers use high quality over-the-ear headsets.
Phantom Power – Some microphones and audio equipment need power to operate. Therefore some amplifiers provide 48volt DC power over the XLR cable. Most good/professional amps allow for this to be toggled easily (as easily as changing a mic).
Discussion
I am looking at six microphones in my office and that does not include the mobile phones (2) on my desk. Nor the fancy-assed digital stereo portable recorder.
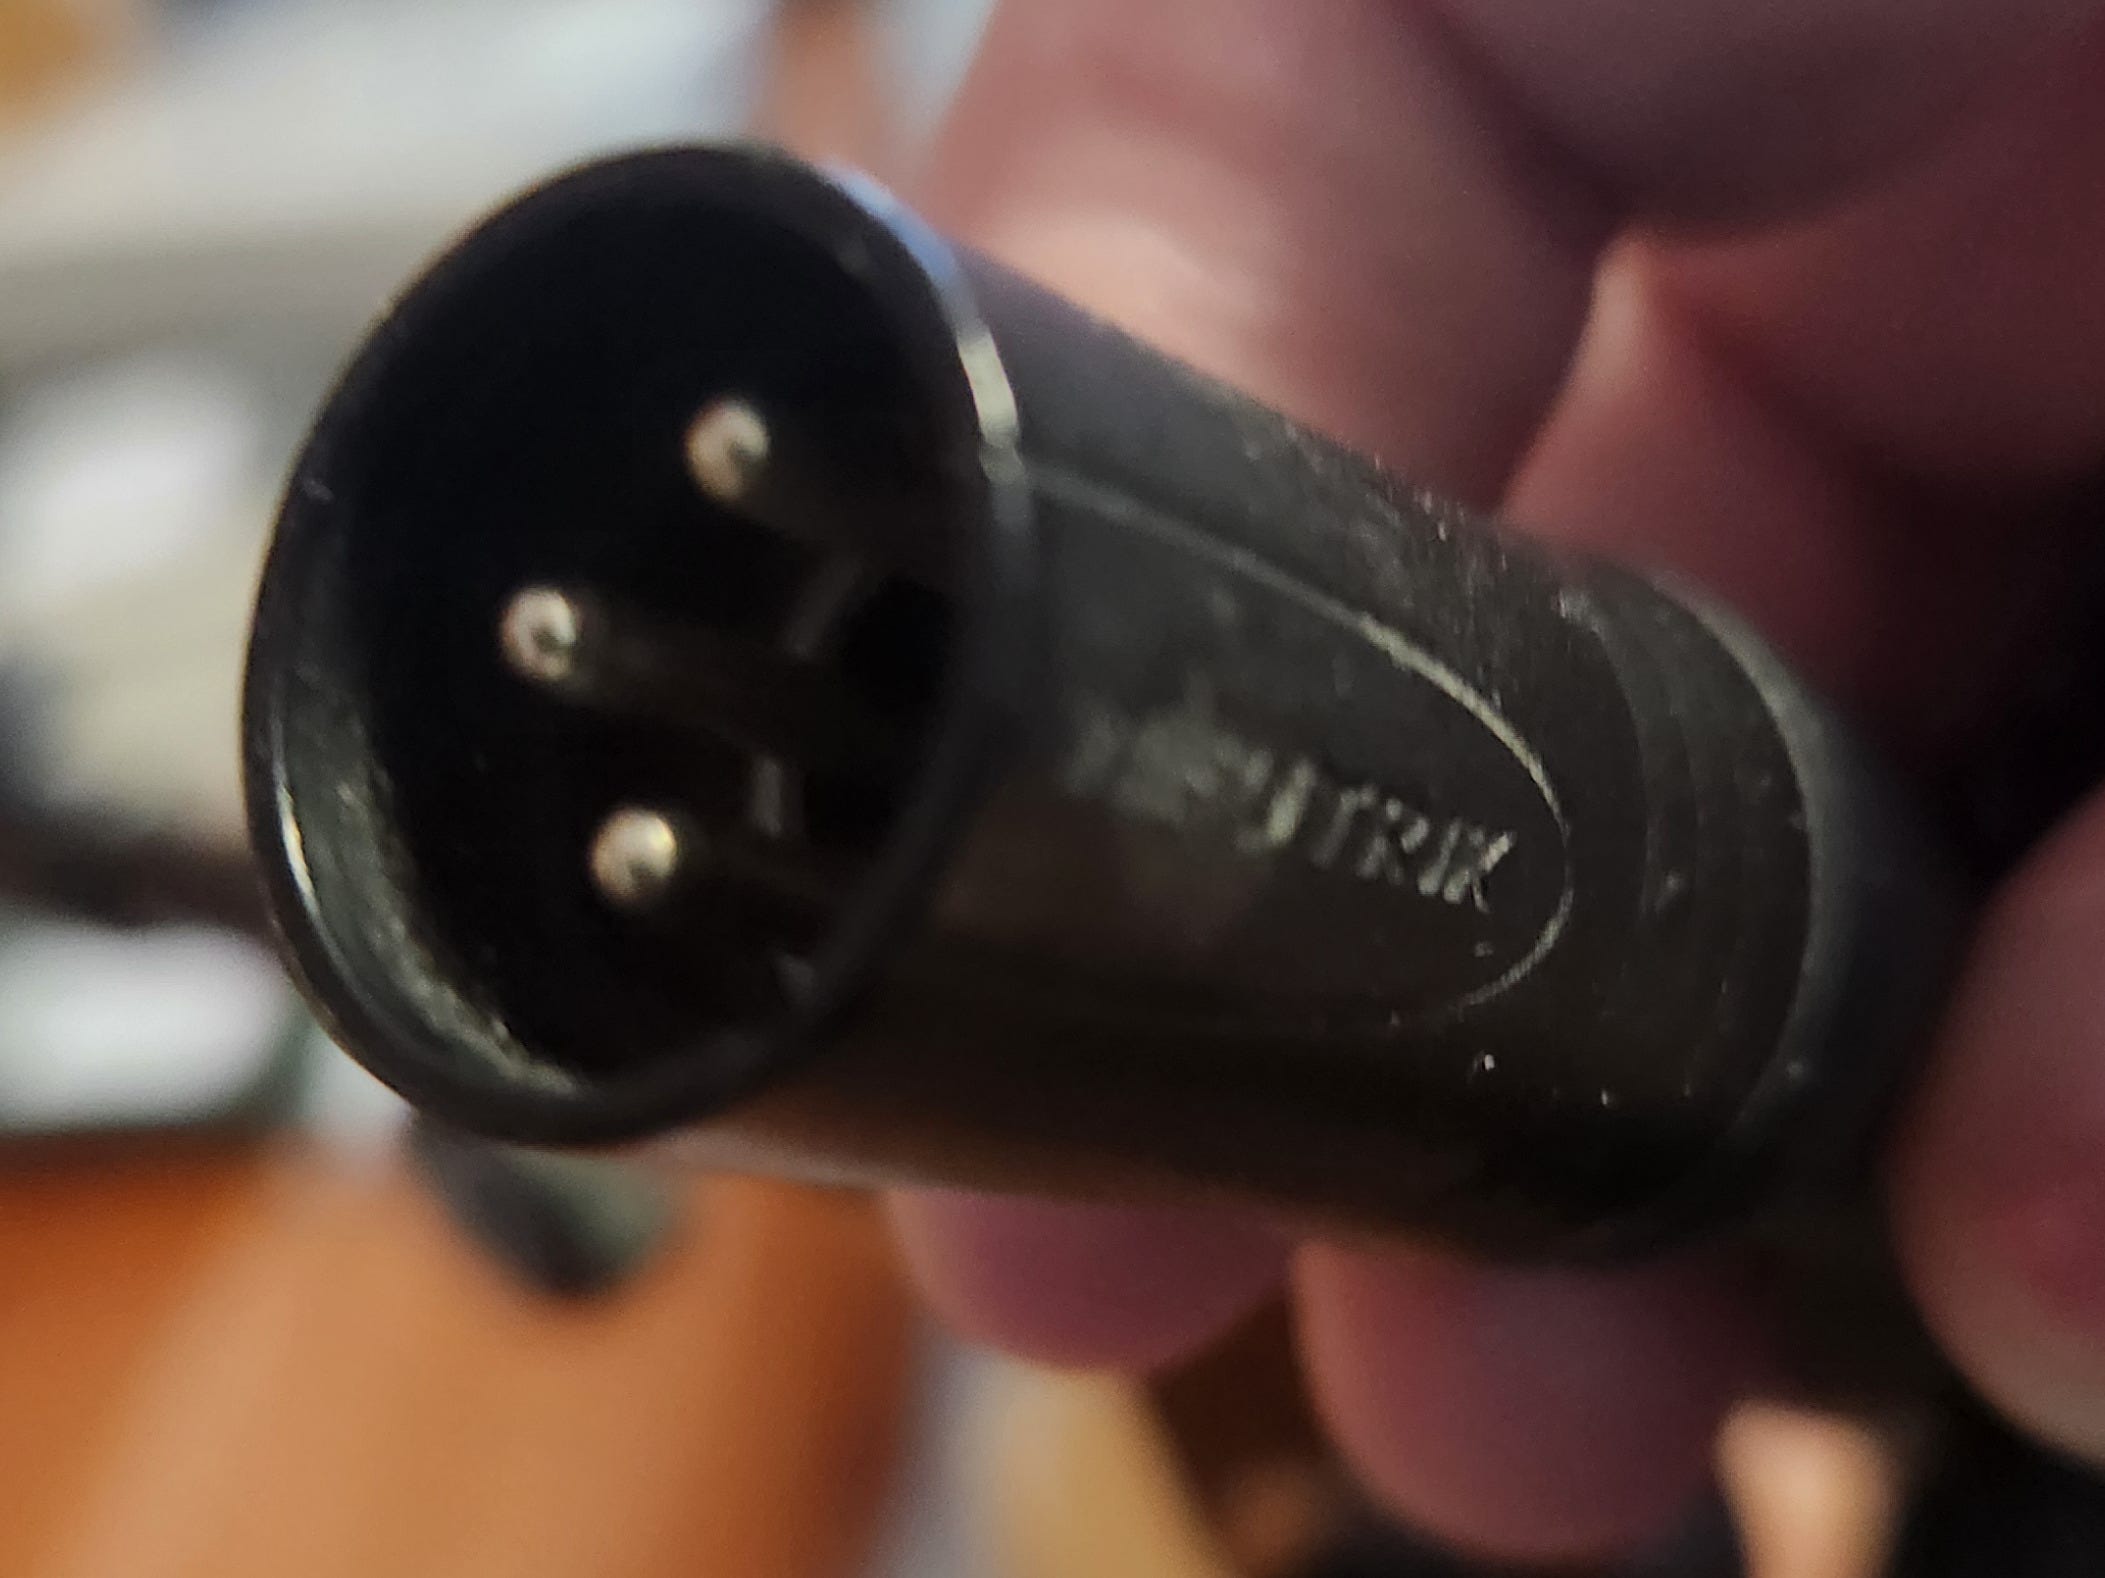
When starting this adventure, I also decided to invest in professional-level equipment. You absolutely CAN do this work with a USB-style microphone. And you will need a USB connection in the stack, but let that come later. I opted to go with XLR interfaces (a round interface with 3 pins) for mics. I did this because quality matters.
My mic connects to an amplifier. This is really no different than a kid with a new Fender guitar and an amp. Amp and Mic like peanut butter and jelly. They need to be matched (more in a bit). Some mics require 48 volt DC power. Some do not. Some mics need a specific “gain” as mine does.
Gazintas and Gozattas
Your mic has one port. I connect my shielded and short-as-possible-no longer-than necessary XLR cable to this. This cable goes-outta the mic and goes-inta the amp. A USB cable goes-outta the amp and goes-inta the computer. The USB also powers my amp.
Shield Cables, Electrical Interference, and Amazon Cheap Crap
With out the whole lecture on electromagnetic spectrum and physics, let me jump to the fact that audio cables hate being near power cables, light ballasts, or anything that has current or spinning motors. In the US, electricity cycles at 60 hertz (waves per second). The UK/EU run at 50hz. You will hear this buzz if you foul up and break the rules. Good luck finding it after introducing it. Oh and run your cable anywhere near your mobile phone, wifi node, router, or your laptop charging cable, you sunk your own ship. Game over.
1) Buy high quality shielded cables from a respected A-V vendor (NOT AMAZON). I tend to buy from B&H Computers in Manhattan. The shielding prevents/minimizes external influence on the electrical wave form that carries your voice to the amp.
2) Buy cables of multiple lengths. My 1m cable is perfect for the gantry stand my mic is on. It just reaches the amp on the desk 3 feet-ish below. I have a 2m cable if I have to stand. Even coiling a long cable can create audio issues.
3) Anything that you introduce to these connections may cause problems including cheap crap that swears it is “gold” or what ever. 100% of the audio stuff I bought from Amazon in the early days got tossed in the bin, including small cables, splitters, and other incidentals. Just don’t. Buy once, pay once and work for decades.
4) Most USB cables are cheaply and poorly made. The most common offer no electro-magnetic shielding. When connecting amp to computer, use the best quality and shortest possible USB cable
5) There are fine USB mics on the market. They are intended for plug-n-play managed by the computer’s operating system (Windows, Mac, Linux). I gave up on them a while ago due to auto-gain, and issues with using a mic that expects to go direct to a computer but needs to live on an amp. The USB route substitutes poor tech to make it “simple” for user.
Mic Isolation
When recording I have my keyboard and mouse at hand. I need ’em both. I have to advance my script (mouse) and I have to control recording (start = * | stop = space-bar). I shuffle my feet. I fidget my ass on the hard chair. I am human.
My mic is mounted to a stud in my office wall like a lamp. They can go on a floor stand. I just don’t have sufficient room. If on the floor, you run risks of floor noises being picked up. A small carpet helps as does a elastic cage that holds the mic. These further isolate the mic from vibrations.

My Mic
I use an Shure SM7B mic.
There’s a lot I love about this mic, and a few things I don’t. I love that this is a low-gain mic. Sounds horrible, right? No! It does not pick up sounds beyond a narrow physical range. No dog farts and flushing toilets, although it does pick up my mobile (which I forget to mute). This mic requires an amplifier that can boost the sound by +60dB, a feature available on a lot of good amps.
I sound good on this mic. With a bit of tuning on my DAW, I now do NOT have to trim out breath sounds. With the mic at left side cheek/lip, it doesn’t pick up nose sounds (yeah, you’ll learn to blow and clear your nose before recording). This mic has a deeper richer sound than others I tried.
Downside? I have a problem with plosives. Plosives are a popping sound you hear with “t”, “p” and “b”. I’ve tried 2 windscreens and the big fuzzy cover (dead cat like) that comes with it. For listeners with in-ear speakers, it can be annoying.
I have a standard singers/stage mic. I am less well matched to that. I love them on stages or if I have to fun stuff with microphone proximity dynamics (think: rappers). When recording books, I am not trying to toss my voice to the back of an auditorium, which is where this mic excels.
The Cans
You want honest and complete sound in your headset. Do NOT use noise reduction headsets. They will lie to you. And unless you have expensive custom “ear monitors” that you’ll see singers use, let me suggest over-the-ear monitor headsets.
You need to isolate the whole ear from other sounds (blowing heat, AC from a room away, spousal footfalls). You also want to avoid the crap that Bluetooth and other wireless tech introduces to the sound. In ear “ear buds” and related also strive to “improve” the sound you hear by using audio filters. You need to hear those sounds to clean them up.
I bought Sony Dynamic Stereo headphones MDR-7506. I immediately bought another pair.
They are comfortable. Pros wear these for full 8 hour and longer work days.
They have a good interface for the 0.5mm (mini) jack and the standard audio jack. The adapter screws securely in place. No rattling, no annoying interference.

As mentioned I have both ears fully covered when editing. I expose my right hear when recording due to the milliseconds it takes my voice to travel from mouth to mic to amp (to computer, back to amp, the to monitor).
Yes, I owned and used Bose Noise Reduction (NR) Headsets for over twenty years. I thought they’d be good for this job. No. Again, there is added tech that “wishes” to improve the quality of the sound you hear. That’s now the NR tech works. NR works by having its own mic that samples ambient sounds then transmits a similar but interfering wave (physics is cool). Yes, it deadens the sound of an airplane and the rumble of a train.
Amplifier
The Shure SM7B does not require phantom power, but it does require +60dB of amplification (gain). Most $100 amps can’t do this well. I bough the “Volt 1” instead of the Cloudlifter CL-1. One YouTube I’ve seen the Cloudlifter on the SM7B and it sounds grand.
I went with the Volt1 for the following reasons:
1. It fits well on my desk
2. It has knobs and twiddly bits. Knobs make things look like a real tool.
3. I can adjust between direct-monitor and host monitor with a switch. Although I often forget.
4. I can adjust the gain by hand although it is pegged at max for this mic
5. I can adjust the monitor volume in my headset.
6. While it has phantom power, I don’t need it, but I wanted that feature just in case
7. It is powered by the USB cable from the computer. I don’t need to track a separate power cord.
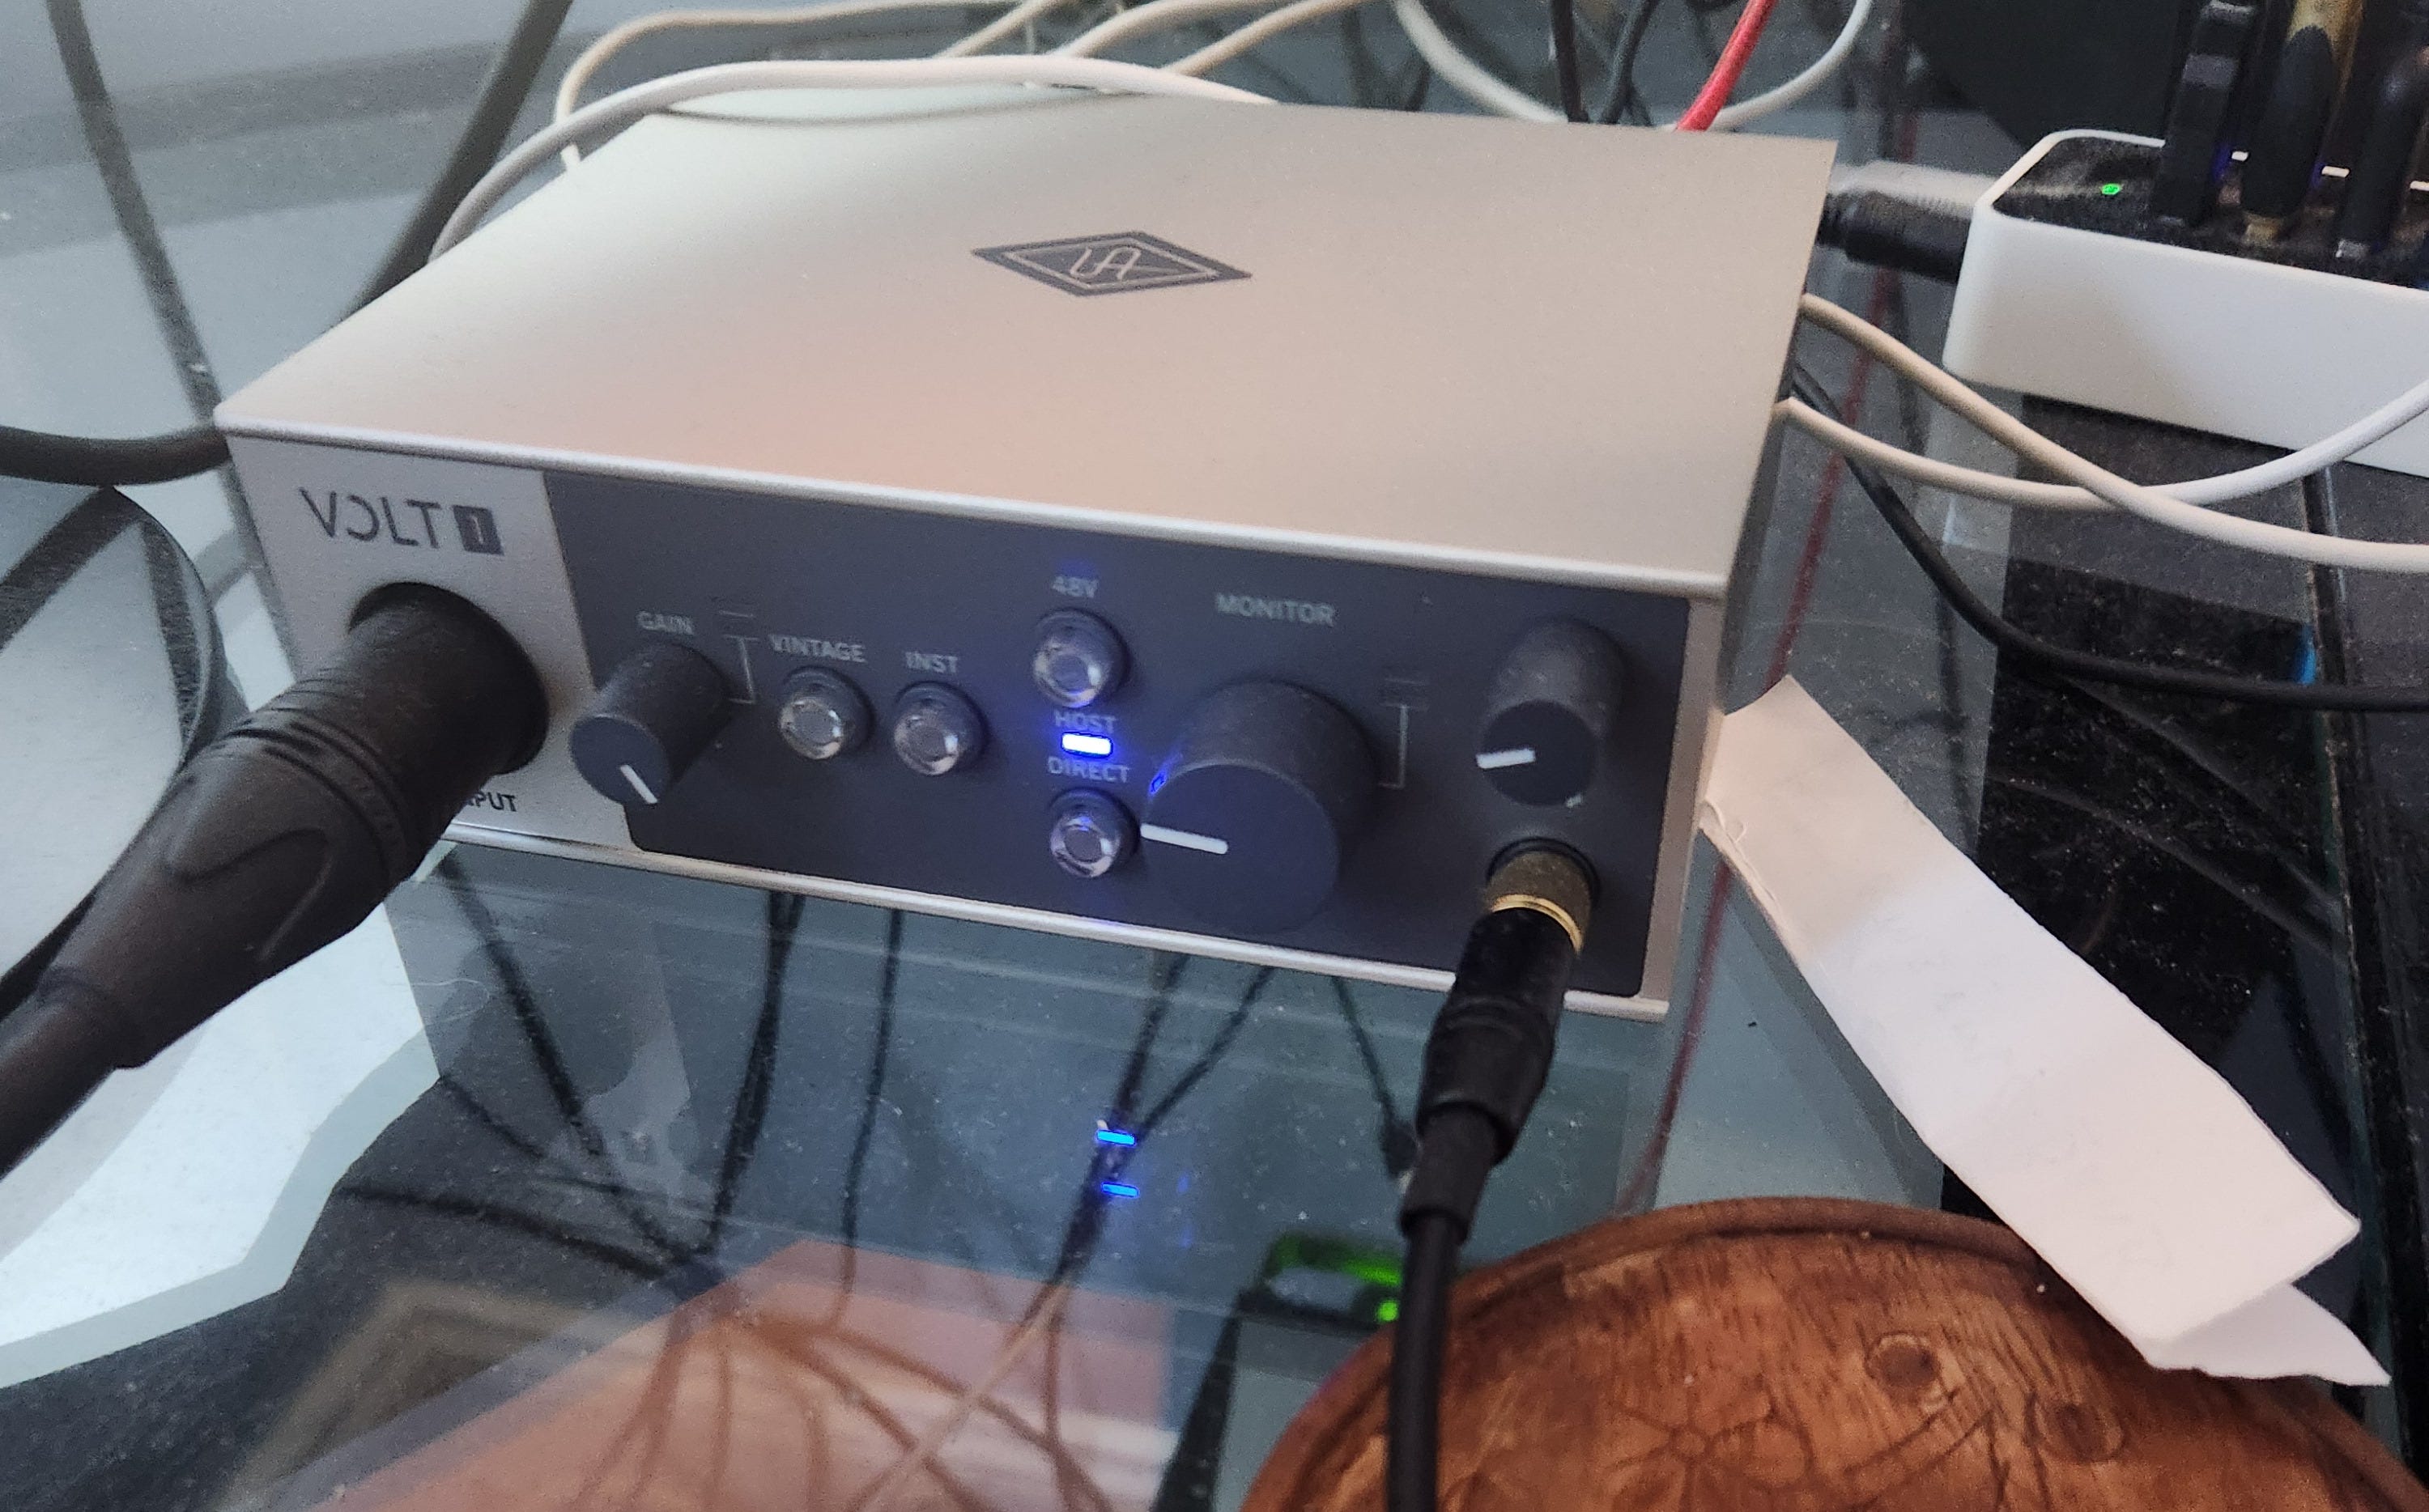
The Volt 1 does require software to be installed on the computer so that the computer understand this input. But once done, you can use this mic and setup on zoom calls. You’ll either be the coolest kid or the geekiest in the little Brady-Bunch tiles.
Digital Audio Workstation (DAW)
I strongly recommend Reaper this comes after a decade-plus on Adobe’s Audition. I poop on Audition and Adobe in a bit.
1. Reaper, while subscription, is an annual fee of $60 for personal use.
2. Reaper includes amazing tools and filters that now save me 25%-50% of my effort while editing
3. Reaper is so often used for voice-over work and such that following the ACX rules come with a few set-n-forget knobs in the software.
4. The interface is intuitive if you have some experience with audio editing or audio editing within a video editing suite (like Canva).
5. Reaper runs under Linux, Windows and Macs. I am actively trying to divorce myself from Microsoft operating system and Office.
Reaper is profession level audio software used at all level in the industry and for all sorts of purposes. We, authors recording books, will use the most streamline, plainest, boringest setups. It kinda expect you to be a 20 year old singer-song writer. You’ll say: Nope, Nope, No, Turn that off, clear that.
I am going to put out a supplemental article on configuring Reaper for voice-over/narration work. There are some very fine videos that are easy to find. Those guys are WAY better than I. My approach will be more prescriptive based on my experience. I don’t have their experience, but I am set up for the stack listed above (Single track, voice-over, SM7B, Volt1)
ACX – The Rules
There are jargony terms below. I have a general understanding, but I walk a narrow path too chicken to stray. If you foul up, the site where audio is uploaded (Ingram, Amazon, etc) will vomit on your shoes.
The rules are here:
https://help.acx.com/s/article/what-are-the-acx-audio-submission-requirements
I’ll show all rules at the end of this section. All of the rules matter. Here is my summary for my setup between Reaper and ACX:
Every chapter, intro, outro, section break is a separate file
In Reaper you record the book in 1 project (call it a file, but kinda wrong-ish). Each chapter is a Region. I color code them. When “Rendering” (creating output file(s)), you identify which Regions to incorporate. My novel has 26 chapters, including intro,outro, etc. I will get 26 files. See illustration below, the region says “26”.
2 Seconds Tip and Tail
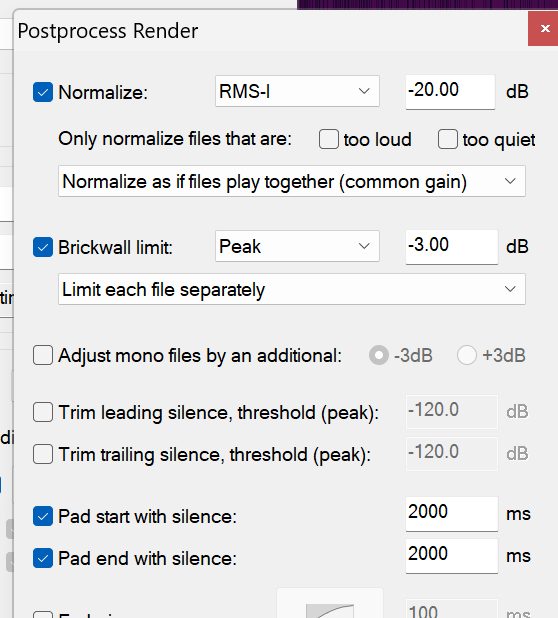
The rule says between 1 and 5 second of silence (“room tone”) at the beginning and end of each chapter (file). I go with 2 because it is between 1 and 5 (duh). 2 seconds is 2000 milliseconds. You’ll see in the illustration that Reaper lets me add “Pad start/end with silence: 2000 ms”
Done and save with project. Remember for next project.
Sample Rate, Format, Mono
While I don’t see it on the current set of ACX guidelines the little note tapes to my monitor says:
Sample Rate: 44100 hz
Channel: Mono
Format: MP3
Bit Rate: 192kbps
Note the illustration. Each of these has a corresponding setting in the software. Easy.
Also observe that the filenames can include the project name (book) and region name (chapter title and number). Huge savings of time that!
Volume Settings
This is the most technical. I’ve watched videos on this and remain novice.
The important thing is that you want all chapters at same volume and to sound the same. Rule: “Audio sound must be consistent”. If you record each chapter to a separate file, it is really tough to get this consistency (Premiere terrible at this). When you record each chapter as a region, then Reaper can compare all volume levels across all chapter levels and provide better results.
In the illustration, I set
Normalization: RMS-1, -20.00dB (rule: between -23dB and -18dB)
Brickwall Limit: Peak -3.00dB (rule: Peak levels below -3dB)
As for “floor noise,” I use a filter in Reaper for that. Mine is more like -35db. See next article.
Lifted from that site (saving you a click):
Audio sound must be consistent: Your audiobook should be consistent in sound and formatting. This includes audio levels, tone, noise level, spacing, and pronunciation. Consistent audio makes for a better listening experience and can lead to good reviews and better sales.
There are no extra sounds: Make sure each file is free of extra sounds like plosives, microphone pops, mouse clicks, excessive mouth noise, and outtakes. These sounds distract listeners and can lead to bad reviews.
Files are in either mono or stereo: All files must be in the same channel format (all mono or all stereo). Mixed formats will cause errors.
Volume is between -23dB and -18dB RMS: Each file needs to fall between the specific volume range of -23dB and -18dB RMS for consistent volume.
Root Mean Square (RMS) is a way to measure the average value of an audio signal. By keeping all files within this range, listeners won’t have to constantly adjust the volume of their playback device. Visit Mastering Audiobooks with Alex the Audio Scientist to learn more.
Peak levels are less than -3dB: Each file must have peak values no higher than -3dB to avoid distortion. By leaving this headroom you’ll reduce the possibility of distortion, which can seriously reduce the quality of the listening experience. This headroom is also needed to ensure the files are successfully encoded.
Click here for an article from the “Alex the Audio Scientist” series on peak level and how it can be controlled during the mastering process.
Noise floor is less than -60dB RMS: Each file must have a noise floor no higher than -60dB RMS to avoid background noise distractions.
Keep room tone less than 5 seconds: We recommend between 1 and 5 seconds of room tone at the beginning and end of each file for an ideal listening experience. Room tone spacing must not exceed 5 seconds
I.M. Aiken
Author & narrator
“The Little Ambulance War of Winchester County” (2024)
“Stolen Mountain” (2025)
“Trowbridge Dispatch” - fictional short stories/podcast
“Captain Henry: 2½ Insurrections, 2 Wars, 1¼ Centuries, and a story of Love” (2026)
follow along at